Manual Camera Settings: A Comprehensive Guide
Today, on April 28, 2026, at 09:51:13, explore iPhone camera icons – flash, Live Photo, and advanced settings – adapting to various shooting modes for optimal control․
Stepping into manual control unlocks a photographer’s full creative potential, moving beyond automatic settings to directly influence image characteristics․ The iPhone’s camera app, while user-friendly in auto mode, offers surprisingly robust manual adjustments via third-party apps or, increasingly, within the native app itself․
Understanding these controls – flash, Live Photo, exposure, and timer – is crucial․ These aren’t just technical aspects; they are tools for storytelling․ Manual control allows you to deliberately shape the mood, focus attention, and capture a vision precisely as intended․ It’s about understanding how the camera sees, and then telling it what you want it to see․ This guide will demystify these settings․
Why Use Manual Settings?
Automatic modes, while convenient, often fall short when faced with challenging or unique lighting conditions․ Relying solely on the iPhone’s automatic settings can lead to underexposed or overexposed images, inaccurate colors, and a lack of creative control․ Manual settings empower you to overcome these limitations․
Specifically, mastering controls like flash, Live Photo, exposure, and timer allows for artistic expression․ You can intentionally create motion blur, freeze action, or achieve a specific depth of field․ Manual control isn’t about complexity; it’s about precision․ It’s about taking ownership of the final image and realizing your photographic vision, rather than accepting what the camera dictates․
Understanding the Exposure Triangle
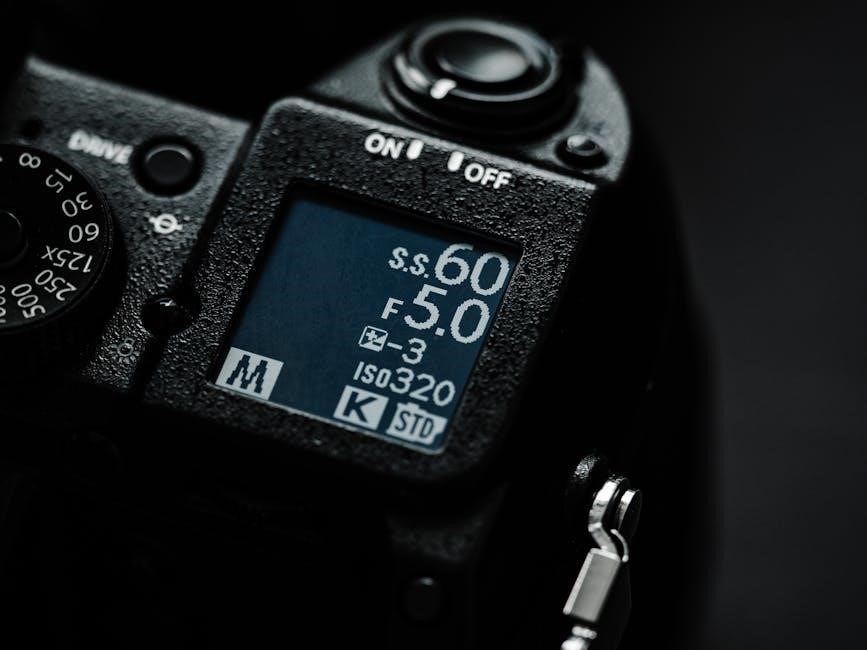
The foundation of manual control lies in understanding the exposure triangle: aperture, shutter speed, and ISO․ These three elements work interdependently to determine the brightness and overall look of your photograph․ Adjusting one setting necessitates compensating with others to maintain proper exposure․
Think of it as a balancing act․ The iPhone camera app’s icons for flash, Live Photo, and exposure control become tools in this process․ Mastering this triangle unlocks creative possibilities, allowing you to manipulate depth of field, capture motion, and manage image noise․ Ignoring this interplay results in technically flawed or artistically limited images․
Aperture: Controlling Depth of Field
Aperture, expressed in f-stops (like those adjusted via the iPhone camera app’s exposure controls), dictates the size of the lens opening․ A wider aperture (lower f-number, e․g․, f/1․8) creates a shallow depth of field, blurring the background and isolating the subject – perfect for portraits․ Conversely, a narrower aperture (higher f-number, e․g․, f/16) yields a greater depth of field, keeping more of the scene in focus, ideal for landscapes․
Understanding this relationship is crucial․ The aperture directly impacts how much light reaches the sensor, influencing exposure alongside shutter speed and ISO․ Mastering aperture allows for deliberate creative choices, shaping the visual narrative of your photographs․
Shutter Speed: Capturing Motion
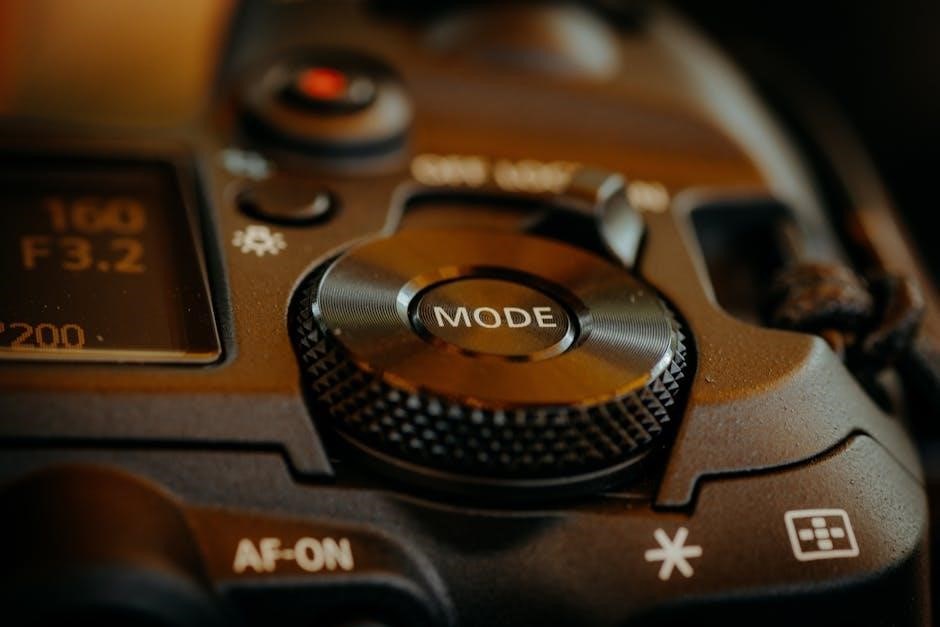
Shutter speed, a key setting accessible through the iPhone camera’s advanced controls, determines how long the camera’s sensor is exposed to light․ Fast shutter speeds (e․g․, 1/1000s) freeze motion, capturing sharp images of fast-moving subjects like sports or wildlife․ Slower shutter speeds (e․g․, 1/30s or longer) allow motion blur, conveying a sense of movement and speed – useful for waterfalls or light trails․
The interplay between shutter speed and aperture is vital for proper exposure․ A slower shutter speed requires a wider aperture (or higher ISO) to maintain brightness, while a faster shutter speed may need a narrower aperture (or higher ISO)․ Experimentation is key to mastering motion capture․
ISO: Sensitivity to Light
ISO represents your camera sensor’s sensitivity to light, directly impacting image brightness․ Lower ISO values (like 100) are ideal for bright conditions, producing clean images with minimal noise․ As light diminishes, increasing the ISO (e․g․, 800, 1600, or higher) brightens the image, but introduces digital noise – graininess that degrades image quality․
Finding the optimal ISO involves balancing brightness and noise․ Modern smartphones, like iPhones, handle higher ISOs relatively well, but it’s best to keep it as low as possible to maintain detail․ Understanding ISO is crucial for shooting in low-light scenarios without sacrificing image clarity․
Mastering Aperture
Aperture is the opening within your lens that controls the amount of light reaching the camera sensor, and profoundly influences depth of field – the area of your image that appears sharp․ It’s measured in f-stops (e․g․, f/2․8, f/8, f/16)․ Lower f-stop numbers (like f/2․8) indicate a wider aperture, letting in more light and creating a shallow depth of field, ideal for isolating subjects with blurred backgrounds․
Conversely, higher f-stop numbers (like f/16) mean a narrower aperture, less light, and a greater depth of field, keeping more of the scene in focus․ Mastering aperture allows for creative control over your images, shaping the visual narrative․

Aperture and f-stop Explained
Aperture, fundamentally, is the adjustable opening inside a camera lens․ It’s quantified using f-stops – a seemingly counterintuitive system where smaller numbers denote larger openings․ For instance, f/2․8 is a wider aperture than f/8․ This wider opening allows significantly more light to hit the camera’s sensor, crucial in low-light scenarios․
Each f-stop represents a doubling or halving of light intake․ Understanding this relationship is key․ Lower f-stops create shallow depth of field, blurring backgrounds, while higher f-stops yield greater depth of field, keeping more in focus․ Mastering f-stops unlocks creative control․
Depth of Field and Creative Control
Depth of field (DoF) is the area in your image appearing acceptably sharp․ It’s powerfully influenced by aperture; wider apertures (lower f-numbers) produce shallow DoF, isolating subjects against blurred backgrounds – ideal for portraits․ Conversely, narrow apertures (higher f-numbers) maximize DoF, ensuring sharpness from foreground to background, perfect for landscapes․
Creative control stems from manipulating DoF․ A shallow DoF draws attention, simplifying compositions․ A large DoF provides context and detail․ Factors beyond aperture – focal length and subject distance – also impact DoF․ Experimentation is vital to understanding how these elements interact and achieve your desired aesthetic․
Shutter Speed Techniques
Shutter speed dictates how long the camera’s sensor is exposed to light, fundamentally impacting motion depiction․ Faster shutter speeds – like 1/1000th of a second – freeze action, capturing sharp images of fast-moving subjects, essential for sports or wildlife photography․ Conversely, slower shutter speeds – such as 1/30th of a second or longer – intentionally blur motion, conveying a sense of speed or movement․
Mastering shutter speed involves balancing it with aperture and ISO․ Slow shutter speeds require a stable camera (tripod recommended) to avoid camera shake․ Experimenting with different speeds unlocks creative possibilities, from silky smooth water effects to dramatic light trails․
Freezing Action with Fast Shutter Speeds
To truly freeze action, prioritize shutter speeds of 1/500th of a second or faster, escalating to 1/1000th or even 1/2000th for incredibly rapid movement․ This technique is crucial for sports photography, capturing birds in flight, or any scenario where motion is prominent․ Remember, faster speeds require more light; therefore, a wider aperture or higher ISO might be necessary to maintain proper exposure․
Consider your subject’s speed – a running person needs less speed than a speeding race car․ Practice adjusting your shutter speed incrementally to find the sweet spot where motion is halted without sacrificing image brightness or introducing excessive noise․
Motion Blur with Slow Shutter Speeds
Embrace motion blur by utilizing shutter speeds slower than 1/60th of a second – even down to several seconds․ This technique artistically conveys a sense of movement, ideal for capturing flowing water, light trails from vehicles, or the dynamic energy of a crowded scene․ A tripod is absolutely essential to prevent camera shake when employing these slower speeds․
Experiment with different durations to control the intensity of the blur․ Longer exposures create more pronounced streaks, while shorter ones offer a subtle suggestion of movement․ Be mindful of your aperture and ISO to compensate for the increased light exposure during prolonged shutter times․
ISO and Noise Reduction
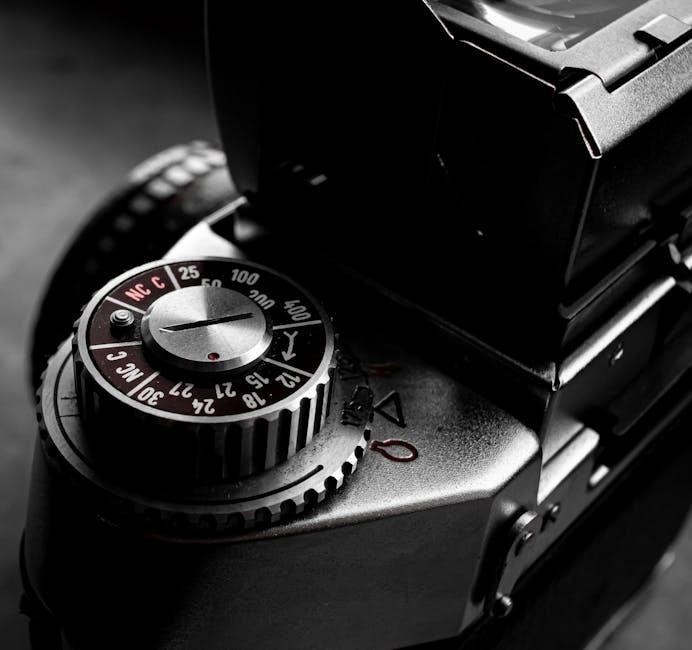
ISO dictates your camera sensor’s sensitivity to light; higher numbers mean greater sensitivity, but also increased digital noise – graininess that degrades image quality․ Strive to keep ISO as low as possible (typically ISO 100) in bright conditions for the cleanest results․ As light diminishes, incrementally raise the ISO to maintain a proper exposure․
Modern cameras offer noise reduction features, both in-camera and during post-processing․ These algorithms attempt to smooth out noise, but can sometimes sacrifice detail․ Finding the optimal balance between ISO, exposure, and noise reduction is crucial for achieving visually pleasing images in challenging lighting scenarios․
Finding the Optimal ISO for Your Situation
Determining the best ISO setting requires assessing available light and your desired creative outcome․ Start with the lowest native ISO (usually 100) and evaluate the resulting exposure․ If the image is underexposed, gradually increase ISO until a proper brightness is achieved, prioritizing a faster shutter speed to avoid motion blur․
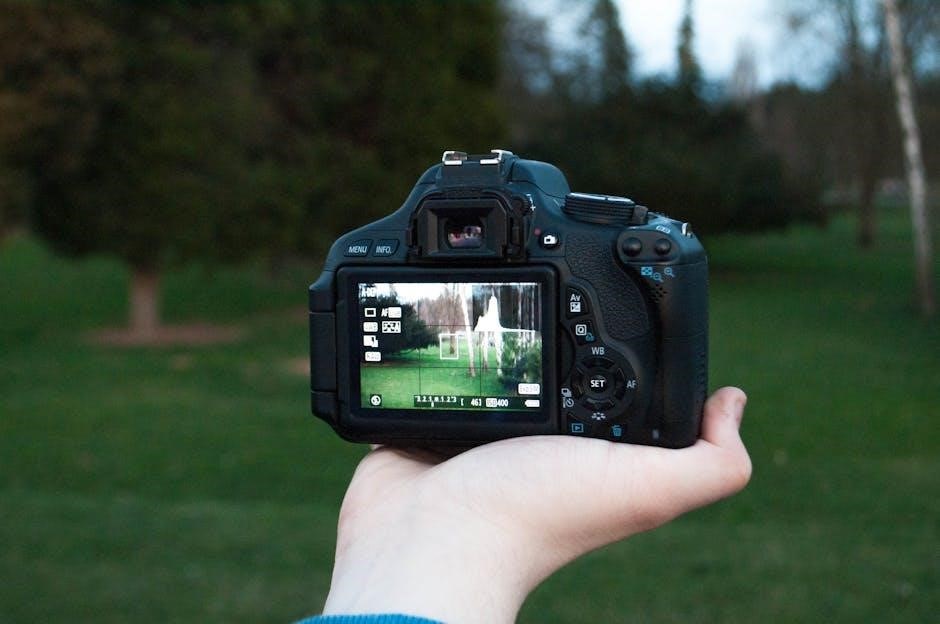
Consider the subject matter; landscapes can often tolerate lower ISOs, while fast-action or low-light scenes demand higher settings․ Experimentation is key! Review images on your camera’s LCD, zooming in to check for unacceptable noise levels․ Balance image brightness with acceptable noise—a slightly noisy, well-exposed photo is often preferable to a clean, underexposed one․
Managing Noise in Low-Light Photography
When shooting in low light, noise becomes a significant concern․ While increasing ISO helps capture sufficient light, it also amplifies noise․ Utilize noise reduction features built into your camera or post-processing software like Adobe Lightroom․ These tools smooth out pixel variations, reducing the grainy appearance․
However, aggressive noise reduction can sacrifice image detail․ Find a balance that minimizes noise without overly softening the image․ Shooting in RAW format provides more flexibility during post-processing for effective noise reduction․ Consider using a tripod to enable lower shutter speeds and, consequently, lower ISO settings, minimizing noise at the source․
White Balance: Achieving Accurate Colors
White balance ensures colors are rendered accurately, preventing unwanted color casts․ Different light sources emit varying color temperatures – measured in Kelvin (K)․ Auto White Balance (AWB) often works well, but manual control offers precision․
Understanding color temperature is key: lower values (e․g․, 2700K) are warm (yellowish), while higher values (e․g․, 7000K) are cool (bluish)․ Cameras offer presets like Daylight, Cloudy, or Tungsten․ For challenging situations, use a grey card to establish a neutral reference point and set a custom white balance․ This guarantees accurate colors, crucial for professional-looking photographs․
Understanding Color Temperature
Color temperature, measured in Kelvin (K), defines the warmth or coolness of light․ Lower Kelvin values (around 2700K-3000K) produce warm tones – yellows and oranges – mimicking incandescent bulbs․ Higher values (5000K-6500K) yield cooler tones – blues and whites – resembling daylight․
Our eyes automatically adjust for these variations, but cameras require assistance․ Incorrect white balance results in color casts; for example, shooting under fluorescent lights without adjustment can create a greenish tint․ Mastering color temperature allows photographers to accurately represent scenes or creatively manipulate mood through color, enhancing the overall aesthetic impact of their images․
Custom White Balance Settings
Beyond presets, most cameras offer custom white balance settings for precise color correction․ This involves using a white or gray card as a reference․ Photograph the card under the existing lighting conditions, then tell your camera to use that image to establish a neutral baseline․
Alternatively, some cameras allow direct Kelvin value input, offering granular control․ Custom white balance is crucial in challenging lighting scenarios where presets fall short․ It ensures accurate color rendition, preventing unwanted tints and preserving the natural appearance of subjects, ultimately leading to more professional and visually appealing photographs․
Focusing Modes: Beyond Autofocus
While autofocus is convenient, mastering manual focus unlocks creative potential and is essential in tricky situations․ Manual focus demands practice, requiring precise adjustments of the focusing ring on your lens to achieve sharpness․ It’s particularly useful in low light or when shooting through obstructions where autofocus struggles․
Modern cameras often assist with manual focusing through features like focus peaking, highlighting in-focus areas, and magnification; These tools significantly aid in achieving critical sharpness․ Learning to switch between autofocus and manual focus expands your control and allows for intentional creative choices in your photography․
Manual Focus Techniques
Successful manual focusing relies on deliberate technique and observation․ Start by slowly rotating the focusing ring while observing your subject through the viewfinder or on the live view screen․ Pay close attention to details – edges, textures – to assess sharpness․ Utilize magnification; zooming in allows for precise adjustments․
Rocking back and forth slightly around the point of perceived focus can help pinpoint true sharpness․ Practice focusing on subjects at varying distances to build muscle memory․ Don’t rush; manual focus is about precision․ Consider using a tripod for stability, especially in low light, to ensure accurate results and minimize camera shake during the process․
Focus Peaking and Assist Features
Modern cameras offer invaluable tools to aid manual focusing․ Focus peaking highlights in-focus areas with a color overlay – typically red, white, or yellow – making sharpness immediately visible․ This feature dramatically simplifies achieving critical focus, especially with fast lenses or challenging subjects․
Focus assist features, like magnification, allow you to zoom in on the image to scrutinize details․ Some cameras also provide focus guides, displaying a scale indicating distance․ Experiment with these settings to find what works best for your shooting style․ Remember to disable these assists after achieving focus to avoid distractions in the final image․
Metering Modes: Measuring Light Effectively
Accurate exposure relies on how your camera measures light․ Different metering modes analyze the scene differently, impacting the final image’s brightness․ Evaluative/Matrix metering assesses the entire frame, ideal for balanced lighting․ It’s a great all-purpose option, but can be fooled by strong backlighting or unusual scenes․
Center-weighted metering prioritizes the center of the frame, useful for portraits or subjects in the middle․ Spot metering measures light from a very small area, perfect for challenging lighting situations where precise exposure is crucial․ Understanding these modes empowers you to consistently achieve well-exposed photographs․
Evaluative/Matrix Metering
This is your camera’s default and most versatile metering mode․ Evaluative, often called Matrix metering, analyzes the entire scene, dividing it into segments and assessing light levels across all areas․ It then calculates an average exposure, aiming for a balanced result․ It’s exceptionally useful in typical shooting conditions with even lighting․
However, be mindful that strong backlighting or scenes with significant contrast can sometimes mislead this mode․ The camera might prioritize overall brightness, potentially underexposing your subject․ It’s a fantastic starting point, but always review your results and adjust if needed for optimal exposure․
Center-Weighted Metering
Center-weighted metering prioritizes the light levels in the center of the frame, giving them the most influence on the exposure calculation․ While it considers the entire scene, the central area carries significantly more weight – typically around 60-80%․ This mode is beneficial when your primary subject is positioned near the center, ensuring it’s properly exposed․
It’s a good choice for portraits or subjects isolated against a background․ However, if your subject is off-center, or the background is very bright or dark, center-weighted metering might require exposure compensation to avoid underexposing or overexposing the main subject․ It offers a balance between simplicity and control․
Spot Metering
Spot metering is the most precise metering mode, evaluating the light from a very small area – typically just a few percent of the frame․ This allows you to measure the exposure directly from your subject, regardless of the surrounding scene’s brightness․ It’s incredibly useful in challenging lighting situations, like backlit subjects or scenes with high contrast․
To use spot metering effectively, carefully aim the spot at the most important part of your subject․ This ensures that area is correctly exposed․ However, it demands more attention and skill, as a slight misplacement can lead to significant exposure errors․ It’s ideal for situations needing absolute control over a specific area’s exposure․